
Blog
Wheel Hub Bearing Removing and Installing
Wheel hub bearing removing and installing steps are as below,
(1) Remove the decorative cover and dust cover of the hub axle.
(2) Remove the tire nut and tire and please don’t damage the thread of the tire bolt. If it is a disc brake, remove the brake and use it to remove the lock ring or lock pin.
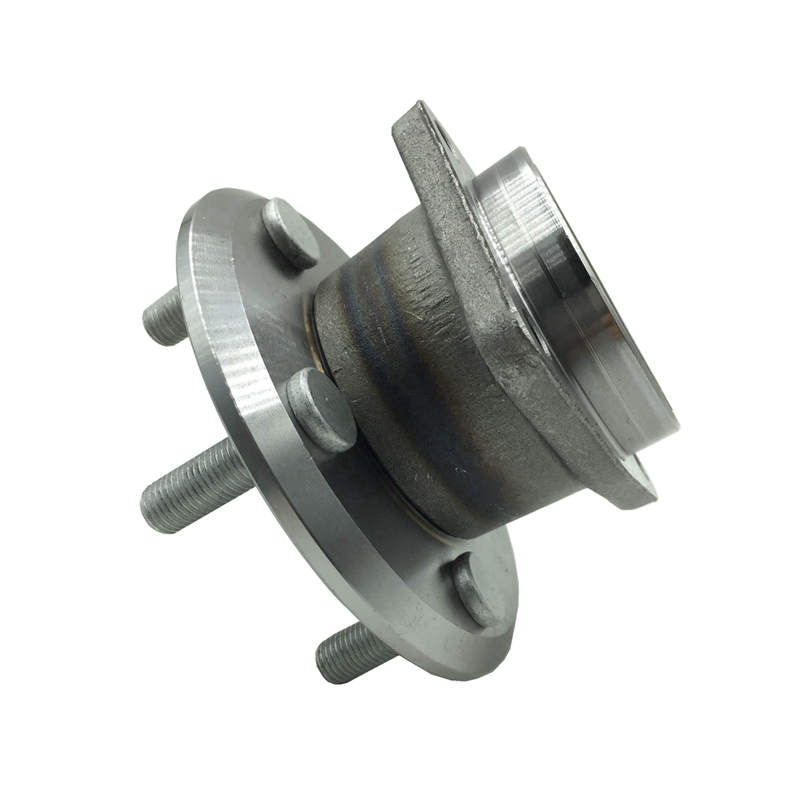
(3) Remove the hub with a special tool.
(4) Scrape off the old grease of the bearing, journal and hub cavity, clean the hub bearing and journal with detergent and dry it with a cloth, and finally wipe the inner cavity of the hub with a cloth.
(5) Check the apperance of wheel hub bearing and bearing races. If you find cracks, fatigue peeling and loose bearing rollers, then please replace the wheel hub bearing with a new one. If pitting is found on bearing race, bearing should be replaced as well.
(6) Check the fit between bearing inner diameter and the journal. The fit clearance should not be greater than 0.10mm. When measuring the journal, the measurement should be made at the upper and lower parts of the vertical ground (the most worn part). If the fit gap exceeds the specified limit of use, the bearing should be replaced to restore the normal fit gap. Burrs and pits on the journal are not allowed to narrow the gap.
(7) After all parts meet the requirements, insert grease into wheel hub bearing.
(8) Pay attention when applying grease to the bearing cavity. The grease should be squeezed into the bearing until the grease emerges from the other side of the bearing. Apply a thin layer of grease to the hub cavity and the axle head cover to prevent rust.
Warm Note: Do not to apply too much grease into the wheel hub bearing cavity, otherwise it will affect heat dissipation and braking.
(9) Put the hub and outer bearing back on the journal, screw on the adjusting nut of the shaft head by hand, and then tighten the adjusting nut according to the specified torque with the shaft head wrench. After tightening the nut, you should turn the hub a few turns left and right in order to check the installation of the bearing. On the other hand, make the bearing and the seat ring fit correctly by turning. At this time, bearing tightness is appropriate, and the wheel rotates freely without feeling the axial clearance.
(10) Finally, install the lock plate, fixing nut, tire, dust cover and decorative cover in sequence.
(11) After adjusting the wheel hub bearing, drive for a certain mileage (about 10km) and stop for inspection. Touch the wheel hub bearing to feel the temperature. If it gets hot, the bearing is adjusted too tightly and you should be re-adjust to loosen bearing tightness appropriately.
If you have any questions of wheel hub bearing removing and installing steps, just leave a comment and our technician will give you reply!
Questions that usually come up after Wheel Hub Bearing Removing and Installing
Which next options usually help after reviewing Wheel Hub Bearing Removing and Installing?
Most buyers benefit from one broader family destination, one more commercial route, and one supporting guide that answers the next practical question. That combination usually turns research into a clearer shortlist.
Why add related bearing destinations beside Wheel Hub Bearing Removing and Installing?
Because the first answer often leads to a second question about fit, applications, supplier choice, or repeat-order confidence. Keeping those next destinations close reduces unnecessary backtracking.
When is it worth moving from reading into a quote or product review?
That move usually makes sense once the topic has narrowed the likely bearing family and the remaining unknowns are commercial, dimensional, or application-specific rather than purely educational.
What usually makes the next bearing decision easier after Wheel Hub Bearing Removing and Installing?
The process is often easier when the wider family view, the more commercial destination, and one practical guide stay visible together. That keeps the decision grounded in both application detail and buying reality.
Buyer FAQ
Questions buyers ask before choosing the next bearing option
What is the main takeaway from Wheel Hub Bearing Removing and Installing?
The main takeaway is that wheel hub bearing removing and installing should be checked against the bearing family, dimensions, load direction, speed, and operating conditions instead of relying on the title or size alone.
When should I use this guide before requesting a quote?
Use the guide when you are comparing bearing models, checking suffix meanings, confirming seal or clearance choices, planning maintenance, or preparing details for replacement, production, or OEM sourcing.
How does this topic connect to wheel hub bearings?
The topic supports the Wheel Hub Bearings decision path by helping buyers understand fit, performance, specification details, or maintenance factors before choosing a product page or contacting the team.
Can this guide replace a final specification check?
No. The guide helps prepare the decision, but a final check should still confirm the part number, dimensions, load, speed, seal, clearance, precision, application, and order quantity.
What should I send if I need help after reading this guide?
Send the bearing number, measured size, photos if available, application, quantity, and any special operating conditions. That gives the team enough context to recommend the right product family or quote route.
Need help checking fit, price, or lead time? Request a bearing quote


